The problem with springs and struts
You are no doubt familiar with autosizing masks – also known as the “springs and struts” model. The autosizing mask determines what happens to a view when its superview changes size. Does it have flexible or fixed margins (the struts), and what happens to its width and height (the springs)?
For example, with a flexible width the view will become proportionally wider if the superview also becomes wider. And with a fixed right margin, the view’s right edge will always stick to the superview’s right edge.
The autosizing system works well for simple cases, but it quickly breaks down when your layouts become more intricate. Let’s look at an example where springs and struts simply don’t cut it.
Open Xcode 5 and create a new iPhone project based on the Single View Application template. Call the app “StrutsProblem”:

Click on Main.storyboard to open it in Interface Builder. Before you do anything else, first disable Auto Layout for this storyboard. You do that in the File inspector, the first of the six tabs:
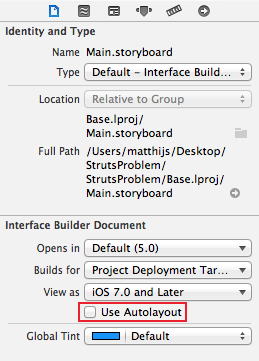
Uncheck the Use Autolayout box. Now the storyboard uses the old struts-and-springs model.
Note: Any new nib or storyboard files that you create with Xcode 4.5 or better will have Auto Layout activated by default. Because Auto Layout is an iOS 6-and-up feature only, if you want to use the latest Xcode to make apps that are compatible with iOS 5, you need to disable Auto Layout on any new nibs or storyboard files by unchecking the “Use Autolayout” checkbox.
Drag three new views onto the main view and line them up like this:

For clarity, give each view its own color so that you can see which is which.
Each view is inset 20 points from the window’s borders; the padding between the views is also 20 points. The bottom view is 280 points wide and the two views on top are both 130 points wide. All views are 254 points high.
Run the app on the iPhone Retina 4-inch simulator and rotate the simulator to landscape. That will make the app look like this, not quite what I had in mind:

Note: You can rotate the simulator using the Hardware\Rotate Left and Rotate Right menu options, or by holding down ⌘ on your keyboard and tapping the left or right arrow keys.
Instead, you want the app to look like this in landscape:

Obviously, the autosizing masks for all three views leave a little something to be desired. Change the autosizing settings for the top-left view to:

This makes the view stick to the top and left edges (but not the bottom and right edges), and resizes it both horizontally and vertically when the superview changes its size.
Similarly, change the autosizing settings for the top-right view:

And for the bottom view:

Run the app again and rotate to landscape. It should now almost look like this:

Close, but not quite. The padding between the views is not correct. Another way of looking at it is that the sizes of the views are not 100% right. The problem is that the autosizing masks tell the views to resize when the superview resizes, but there is no way to tell them by how much they should resize.
You can play with the autosizing masks – for example, change the flexible width and height settings (the “springs”) – but you won’t get it to look exactly right with a 20-point gap between the three views.
To solve this layout problem with the springs and struts method, unfortunately you will have to write some code.
UIKit sends several messages to your view controllers before, during and after rotating the user interface. You can intercept these messages to make changes to the layout of your UI. Typically you would override viewWillLayoutSubviews to change the frames of any views that need to be rearranged.
Before you can do that, you first have to make outlet properties to refer to the views to be arranged.
Switch to the Assistant Editor mode (middle button on the Editor toolset on the Xcode toolbar) and Ctrl-drag from each of the three views onto ViewController.m:

Connect the views to these three properties, respectively:
@property (weak, nonatomic) IBOutlet UIView *topLeftView;
@property (weak, nonatomic) IBOutlet UIView *topRightView;
@property (weak, nonatomic) IBOutlet UIView *bottomView;
Add the following code to ViewController.m:
- (void)viewWillLayoutSubviews
{
    if (UIInterfaceOrientationIsLandscape(self.interfaceOrientation))
    {
        CGRect rect = self.topLeftView.frame;
        rect.size.width = 254;
        rect.size.height = 130;
        self.topLeftView.frame = rect;

        rect = self.topRightView.frame;
        rect.origin.x = 294;
        rect.size.width = 254;
        rect.size.height = 130;
        self.topRightView.frame = rect;

        rect = self.bottomView.frame;
        rect.origin.y = 170;
        rect.size.width = 528;
        rect.size.height = 130;
        self.bottomView.frame = rect;
    }
    else
    {
        CGRect rect = self.topLeftView.frame;
        rect.size.width = 130;
        rect.size.height = 254;
        self.topLeftView.frame = rect;

        rect = self.topRightView.frame;
        rect.origin.x = 170;
        rect.size.width = 130;
        rect.size.height = 254;
        self.topRightView.frame = rect;

        rect = self.bottomView.frame;
        rect.origin.y = 295;
        rect.size.width = 280;
        rect.size.height = 254;
        self.bottomView.frame = rect;
    }
}
This callback occurs when the view controller is rotating to a new orientation. It looks at the orientation the view controller has rotated to and resizes the views appropriately – in this case with hardcoded offsets based on the known screen dimensions of the iPhone. This callback occurs within an animation block, so the changes in size will animate.
Don’t run the app just yet. First you have to restore the autosizing masks of all three views to the following, or the autosizing mechanism will clash with the positions and sizes you set on the views in viewWillLayoutSubviews:

That should do it. Run the app and flip to landscape. Now the views line up nicely. Flip back to portrait and verify that everything looks good there as well.
It works, but that was a lot of code you had to write for a layout that is pretty simple. Imagine the effort it takes for layouts that are truly complex, especially dynamic ones where the individual views change size, or the number of subviews isn’t fixed.
Now try running the app on the 3.5-inch simulator. Whoops. The positions and sizes of the views are wrong because the hardcoded coordinates in viewWillLayoutSubviews are based on the dimensions of the 4-inch phone (320×568 instead of 320×480). You could add another if-statement that checks the screen size and uses a different set of coordinates, but you can see that this approach is becoming unworkable quickly.
Note: Another approach you can take is to make separate nibs for the portrait and landscape orientations. When the device rotates you load the views from the other nib and swap out the existing ones. But this is still a lot of work and it adds the trouble of having to maintain two nibs instead of one. This approach is quite impractical when you’re using storyboards instead of nibs.


